You can use Probo with your instance of Bitbucket Server. Just like the Bitbucket Integration, Probo uses the build status pop-up to display the list of build steps as defined in your .probo.yaml file and their statuses. The link can be found in the Overview section of the pull request details page.
Follow these steps to get started using Probo with your instance of Bitbucket Server:
- Create an Application Link in Bitbucket Server.
- Configure authentication settings.
- Activate repositories.
- Configure webhooks.
Create an Application Link in Bitbucket Server.
- Go to the administration section of your Bitbucket Server installation and create an Application Link.
- Click the settings gear in the top right hand corner of Bitbucket’s interface.
- Go to the Application Links page.
- Create a new link with the address
https://app.probo.ci.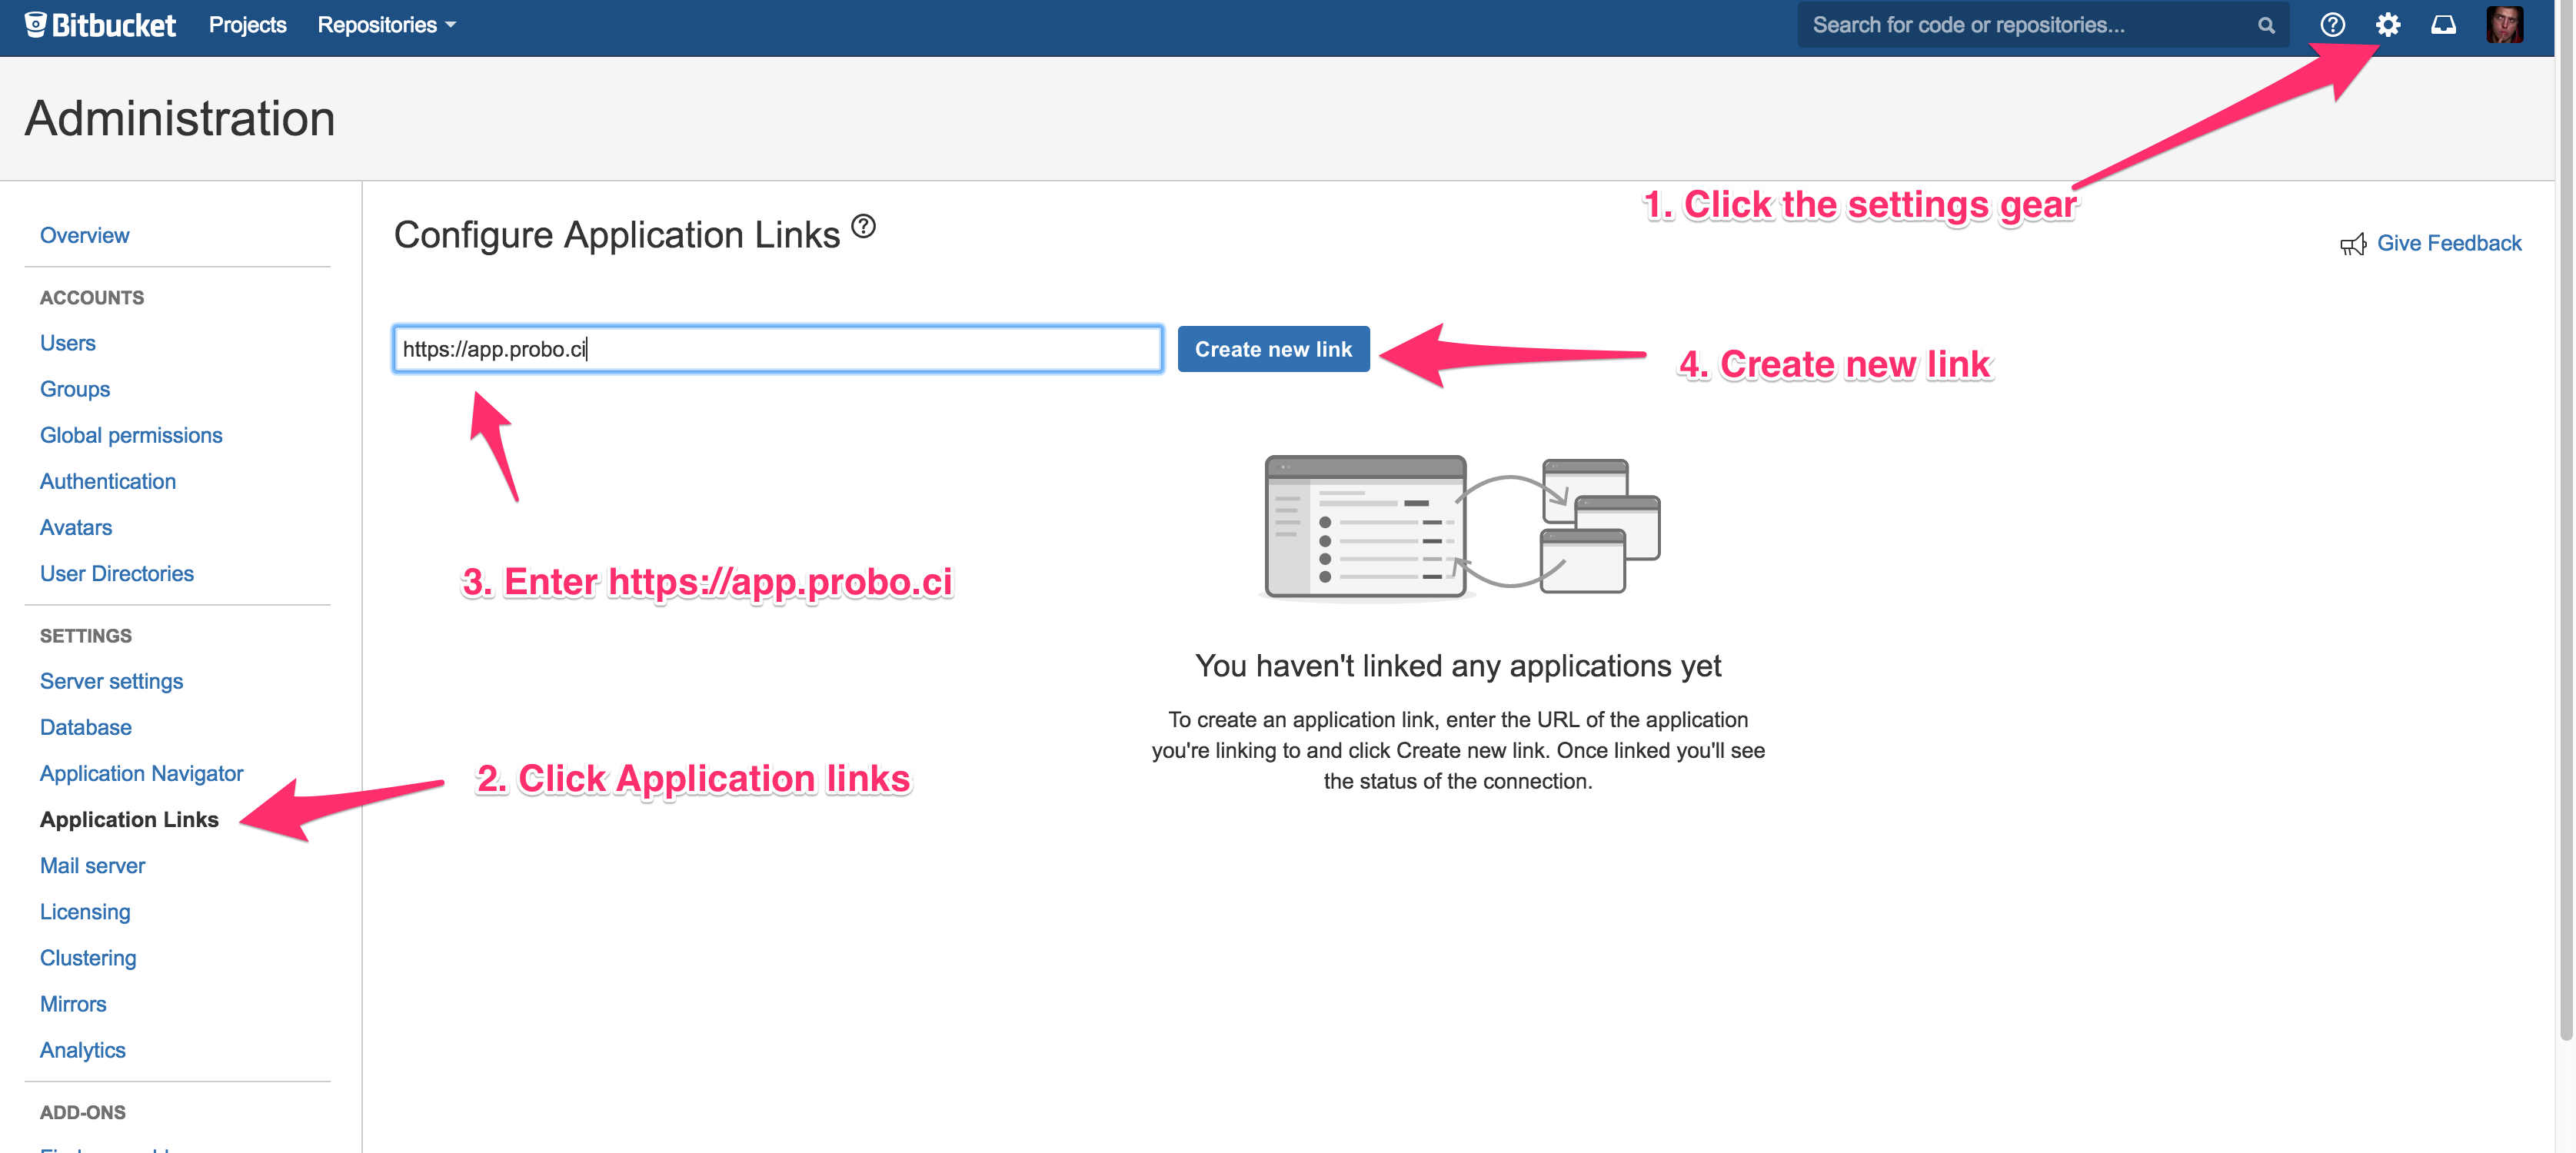
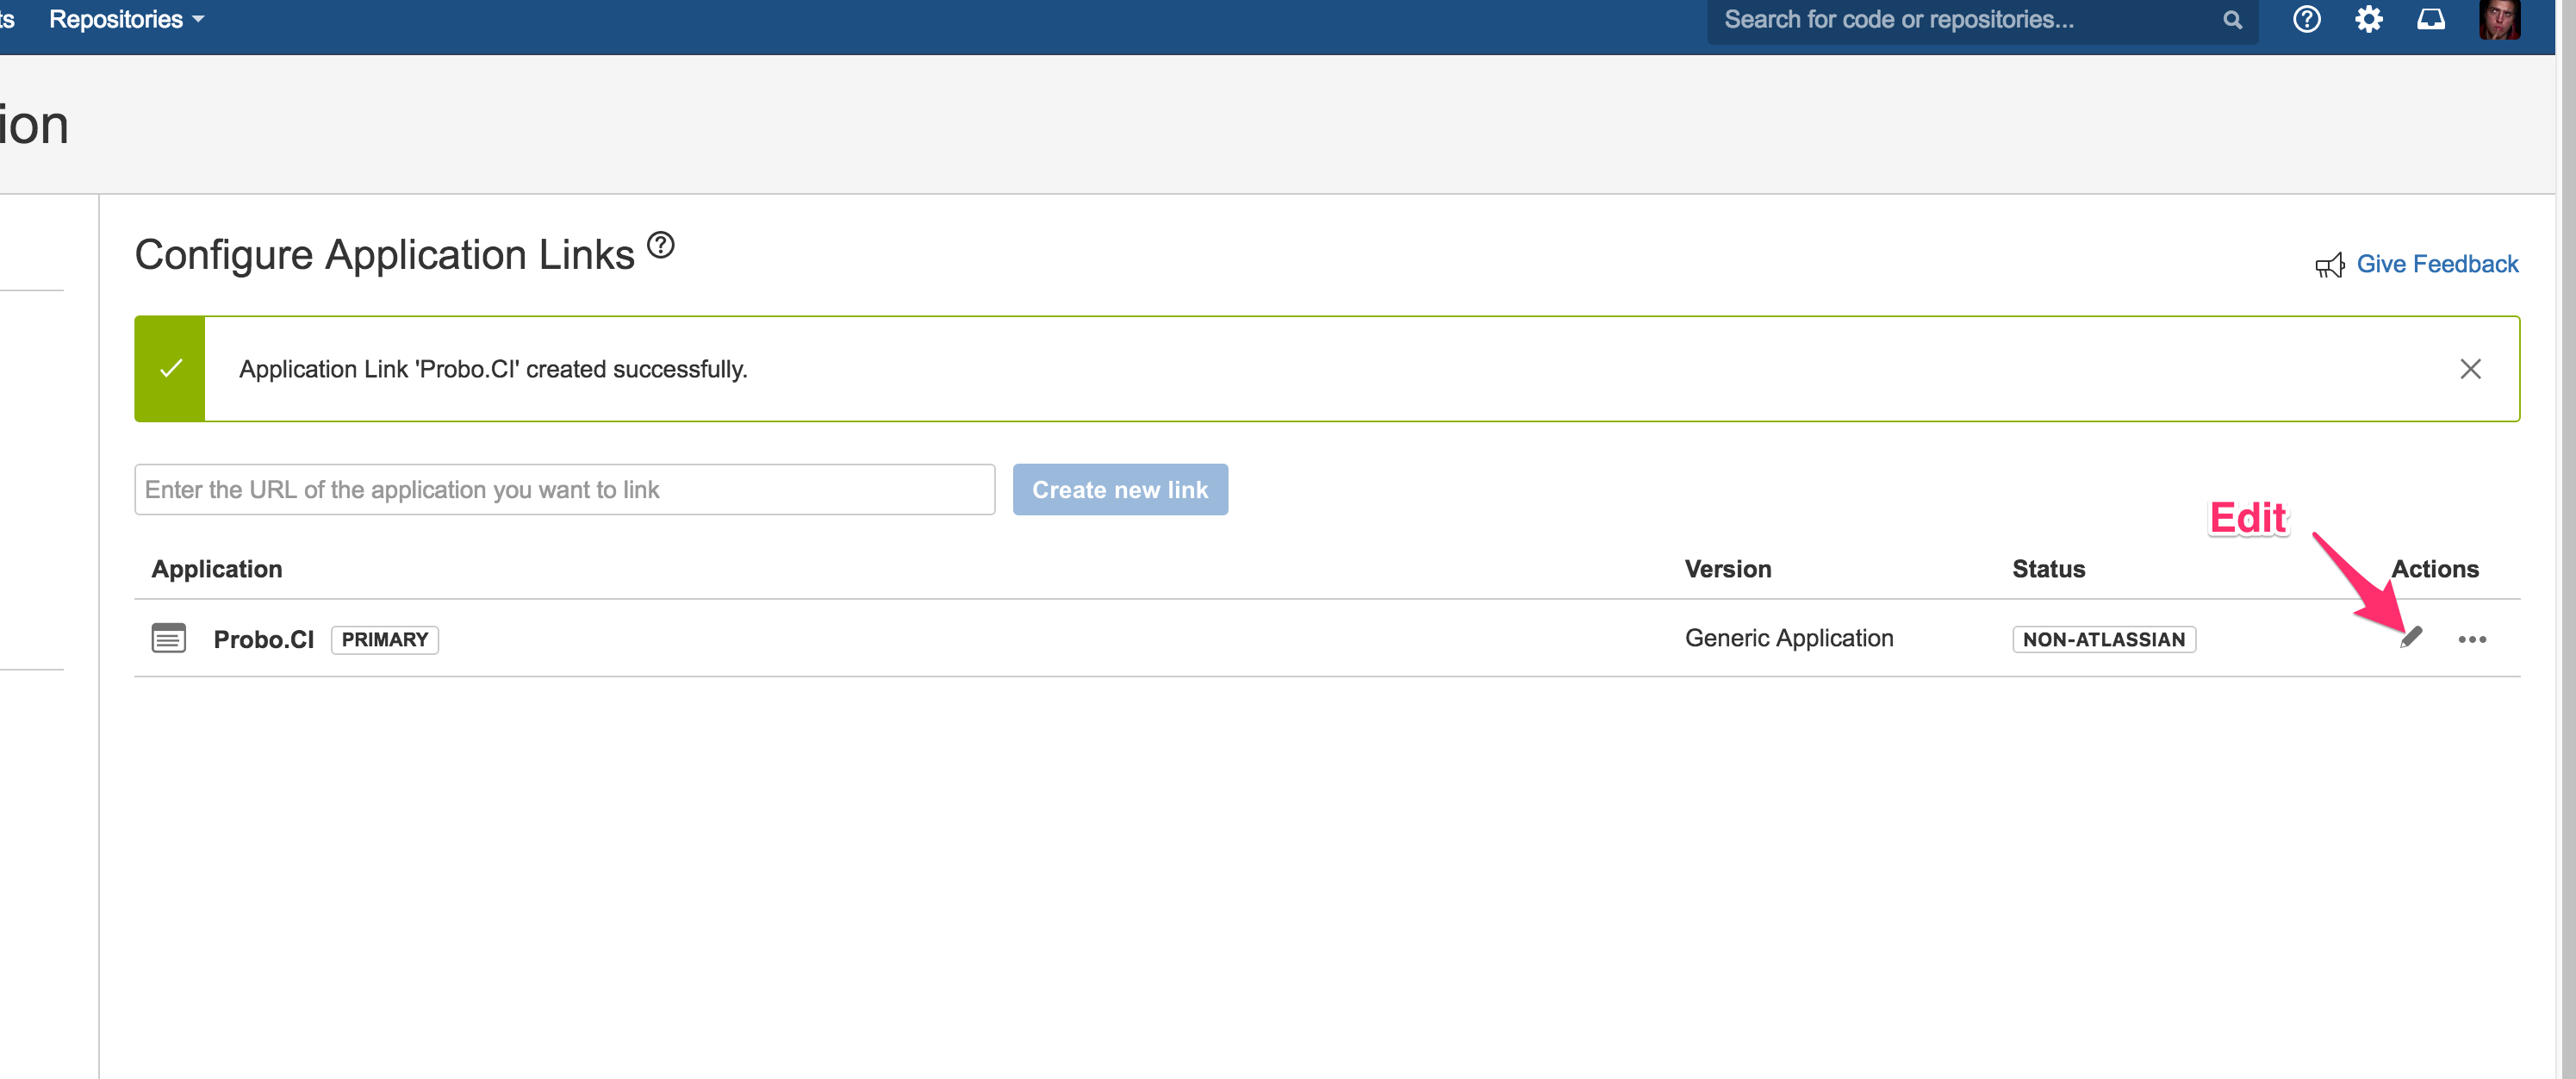
-
Specify
https://app.probo.ciagain as the Application URL.
- Give your application a logical name, such as Probo.CI, and leave the rest of the application settings blank.

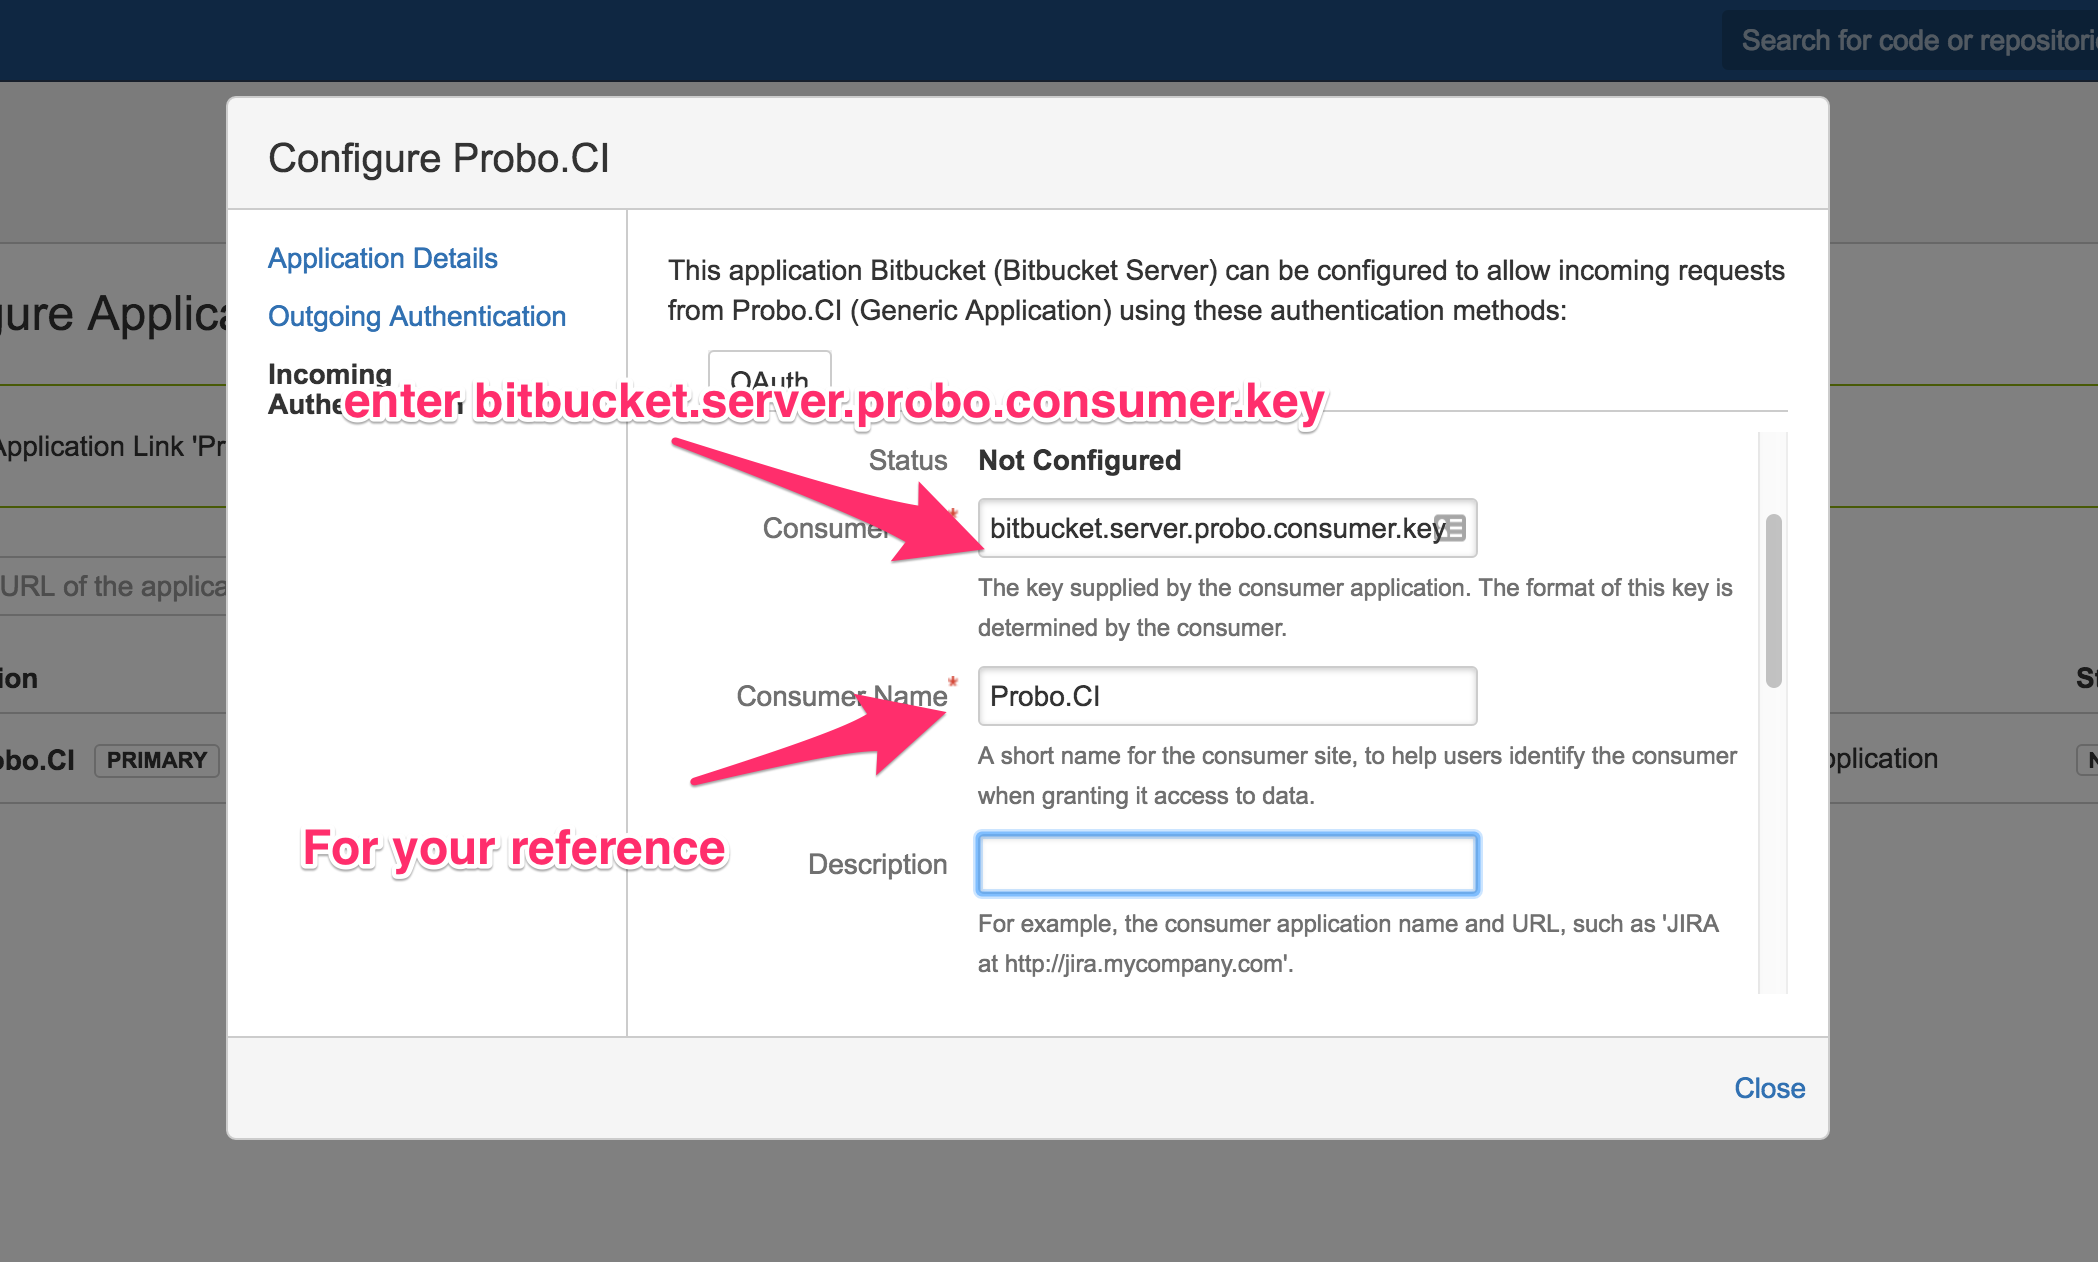
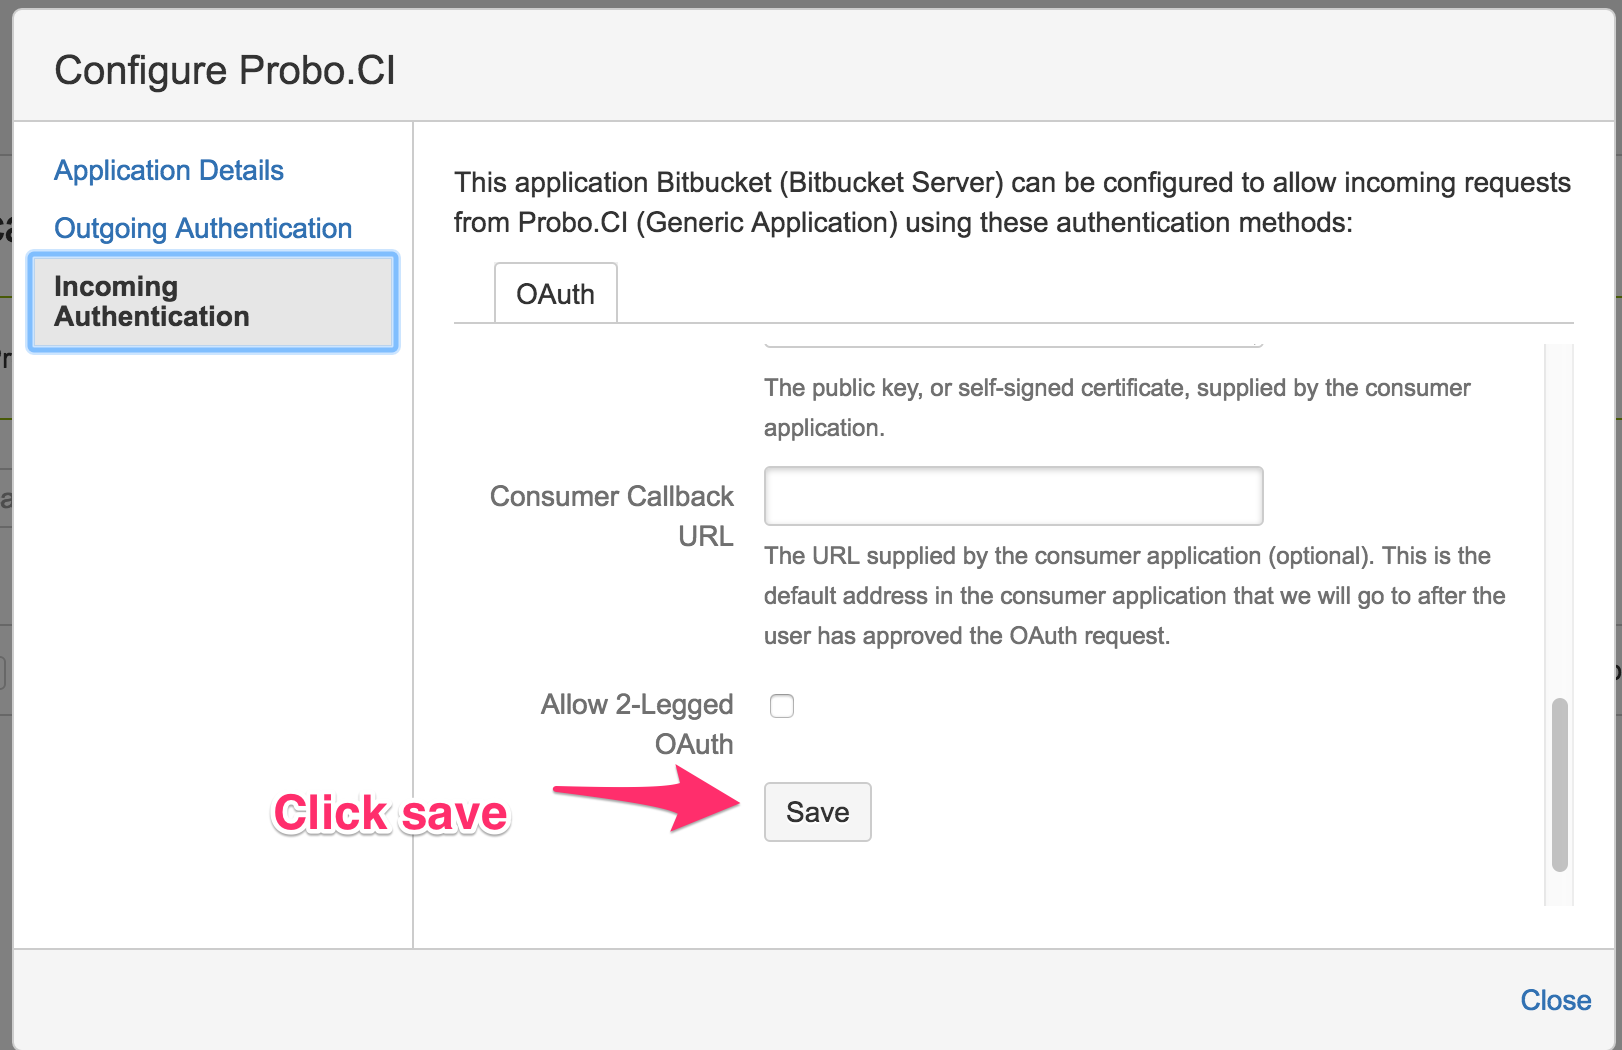
Configure authentication settings.
-
Edit the application link you configured for Probo.CI.
-
In the Incoming Authentication settings, enter bitbucket.server.probo.consumer.key as the consumer key and Probo.CI as the consumer name.
- Enter the following public key:
  MIGfMA0GCSqGSIb3DQEBAQUAA4GNADCBiQKBgQDeIHvKM3ruAGHSs9CKKYQ6RYVq
  fjlqVxbS9XxLnxBBd1honfmz89p9TnmwnarJoD/GA5A5SBpuOA2RCExaPxHU7iap
  s8GZ+GZk24kHcboGRu4ahLeoiWpLjz8fr2Zrsv9zK1DKFfsoXWQyPvnswvXfkIF5
  N/46a9CrOsqu2fXLewIDAQAB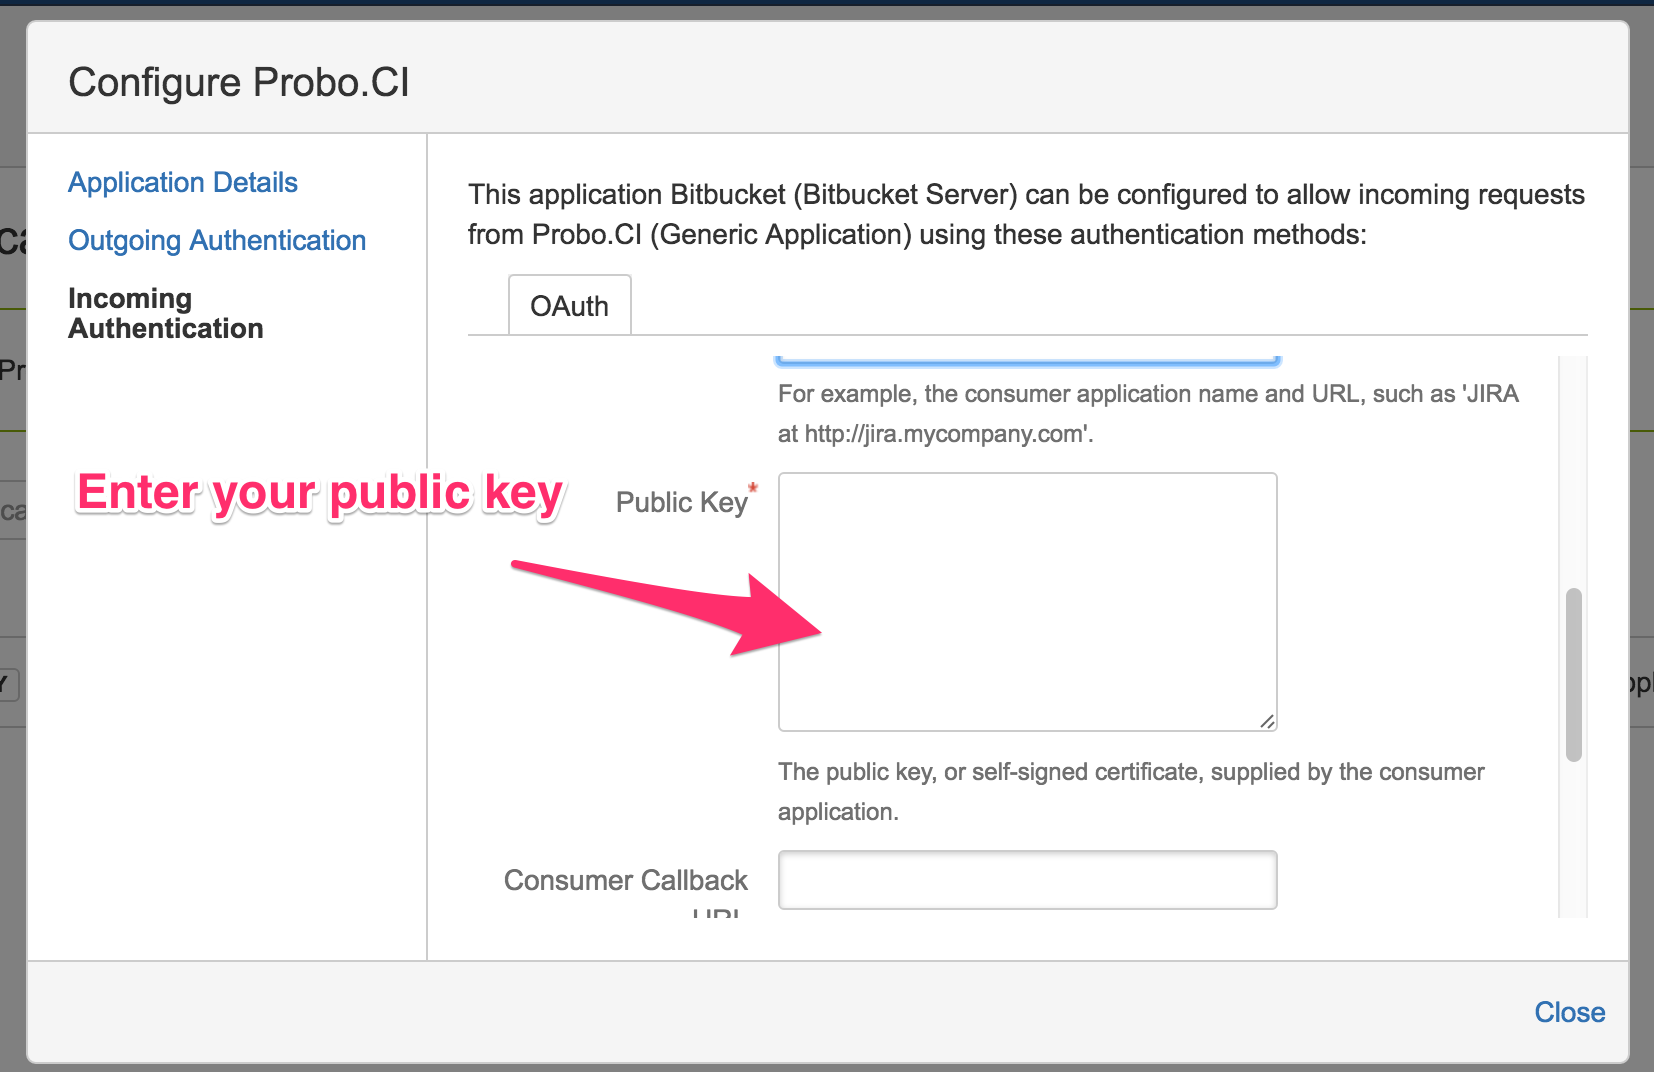
- Leave the rest of the form blank and save.
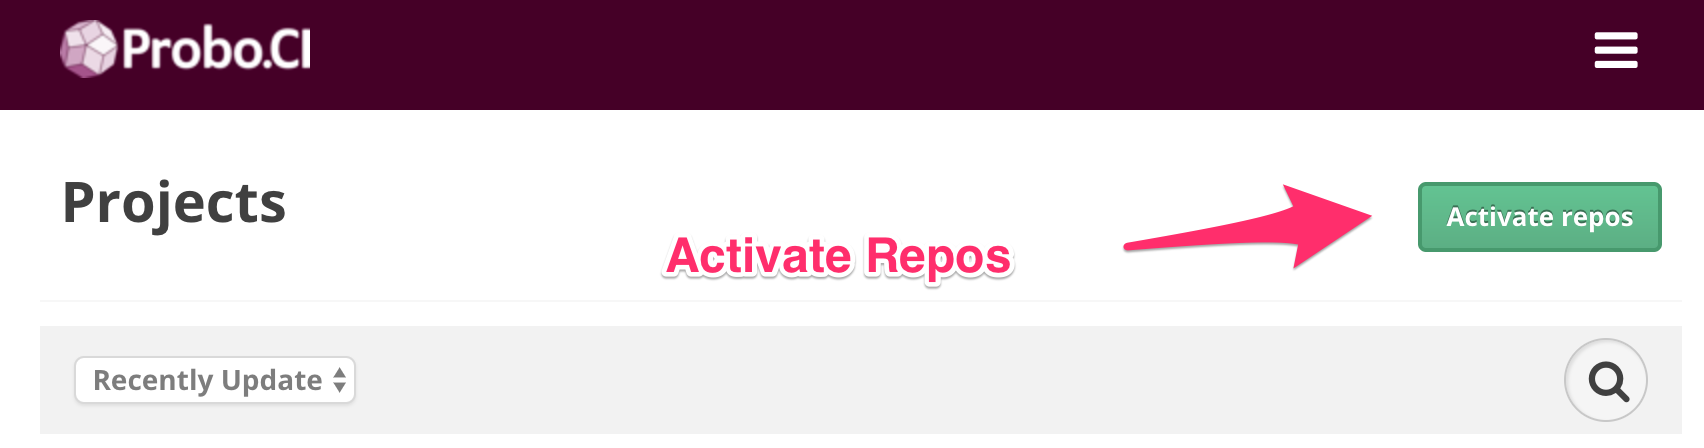
Activate repositories.
-
Go to
https://app.probo.ci/auth/stash/[your full Bitbucket Server instance url]to sign in.Example URL:
https://app.probo.ci/auth/stash/https://stash.yourdomain.com/You will be prompted to login and/or grant access. We have a UI for this coming shortly, but this link will always work.
-
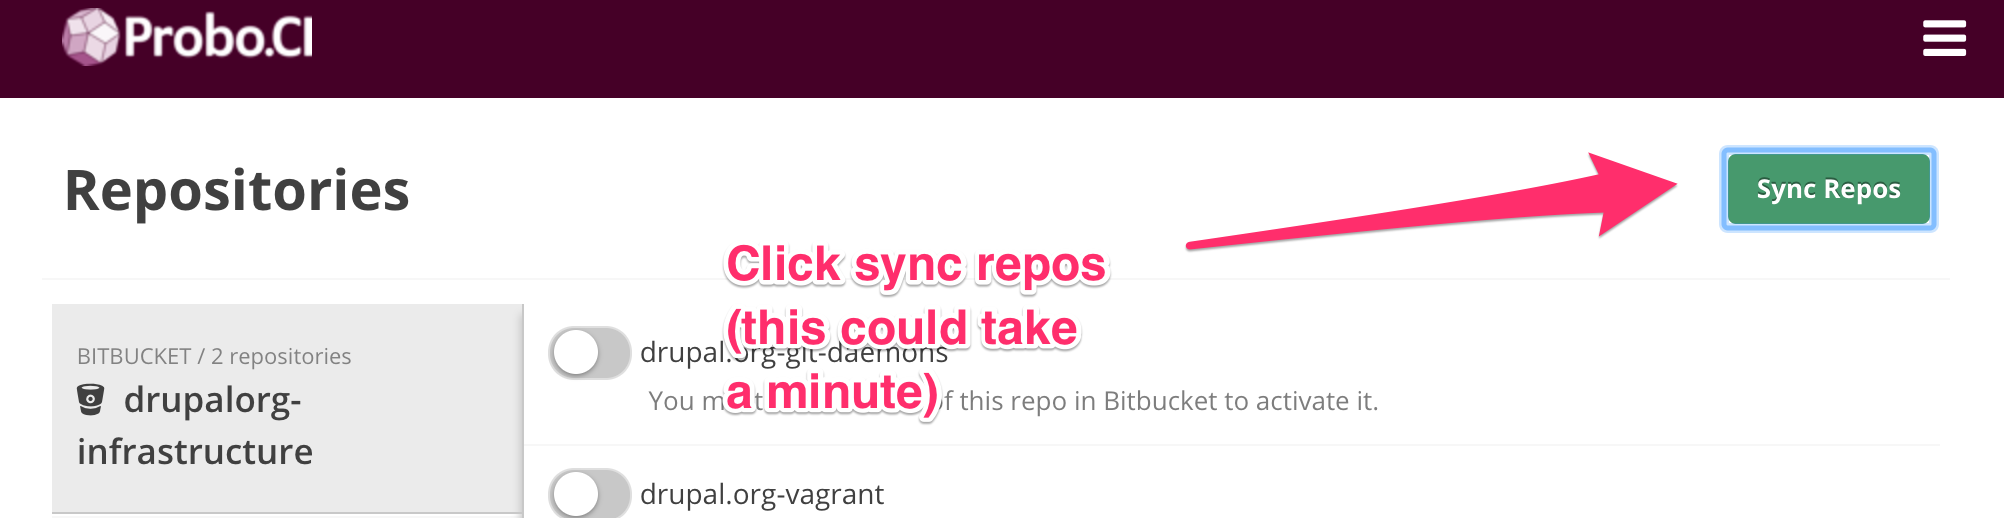
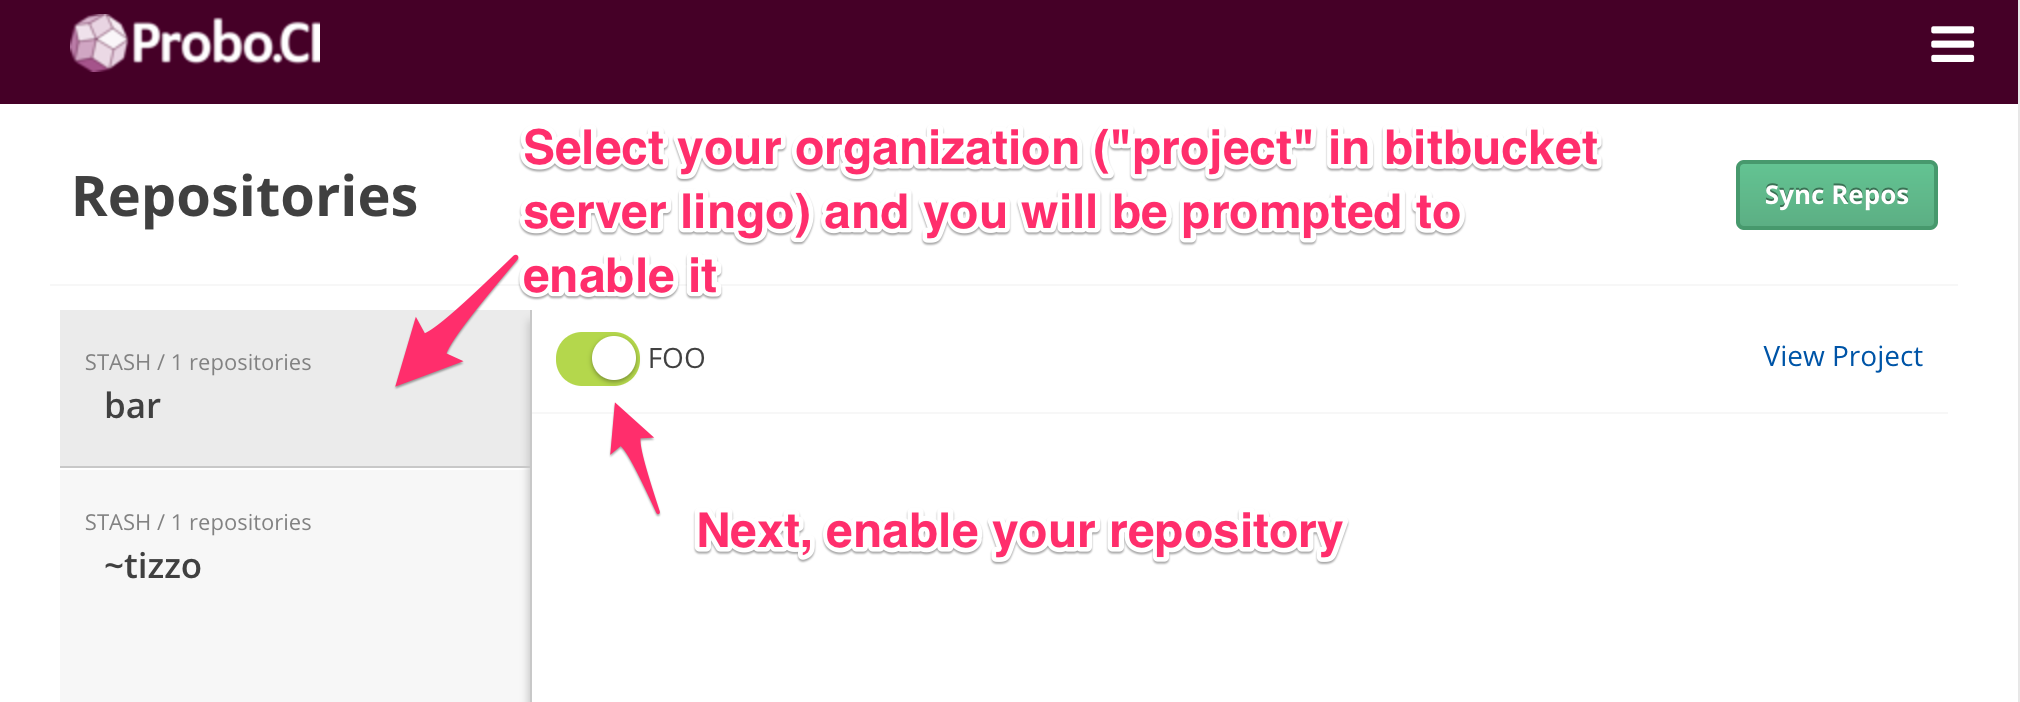
Sync and enable the repositories you want to connect with Probo.
- Press the Activate repos button.
- Press Sync Repos and wait for Probo to pull in your Bitbucket Server repositories.
- Enable a repository by switching the toggle next to it.
Configure webhooks.
Due to limitations in the Bitbucket Server API, we cannot reliably create webhooks for your repositories. You will need to do this manually for each project you enable in Probo.
-
Go back to Bitbucket Server, find your project, and navigate to the project settings.

-
Find the webhooks (or hooks) configuration page and enable Post-Receive WebHooks.

-
Enter
https://app.probo.ci/stash-webhookas the URL.
Profit.
That’s it - now Probo will automatically kick off a build and report progress back to your Bitbucket Server instance when you push code to an open pull request.