You can use Probo.CI with your instance of GitLab Server. Just like the GitLab Integration, Probo uses the build status pop-up to display the list of build steps as defined in your .probo.yaml file and their statuses. The link can be found in the Overview section of the Merge Request details page.
Follow these steps to get started using Probo with your instance of GitLab Server:
- Create an OAuth application on your GitLab Server.
- Register your GitLab Server with Probo.CI.
- Authenticate your GitLab Server with Probo.CI.
- Activate a Probo Organization.
- Activate repositories.
Create an OAuth application on your GitLab Server.
- Visit the Applications page in the Admin Area of your GitLab Server instance. Example:
https://gitlab.example.com/admin/applications - Create an OAuth application with the following required settings.
Name: Enter a name for your OAuth application.
Redirect URI: Enterhttps://app.probo.ci/auth/gitlab/callbackin this field.
Scopes: API (Check the API checkbox.) - Submit your changes to save the new OAuth application.
Next, you need to register your GitLab Server’s OAuth application with Probo.CI.
Register your GitLab Server with Probo.CI.
- Go to http://app.probo.ci/#/self-hosted/new to register a new self-hosted service.
- Enter the following required OAuth connection settings.
Note: The following required settings are found on your GitLab Server OAuth application settings page. Example: https://gitlab.example.com/admin/applications/1
- Server URL: The URL of your GitLab Server instance. Example:
https://gitlab.example.com - Client ID: The
Application IDstring from your GitLab Server instance. - Client Secret: The
Secretstring from your GitLab Server instance.
Now that you have your OAuth application configured and added to Probo.CI, you can authenticate with your GitLab Server.
Authenticate your GitLab Server with Probo.CI.
- Visit https://app.probo.ci/#/self-hosted.
- Enter your GitLab Server URL. Example:
https://gitlab.example.com
Congratulations, you should now be connected! Next, you need to activate a Probo Organization.
Activate a Probo Organization.
Once authenticated you need to activate your Probo Organization by choosing a subscription plan.
Note: A Probo Organization is linked to the base user on the repositories from your GitLab Server instance that you want to enable.
- Click the Activate repos button or the Enable some now! link to start the activation process.
- Next, click the Activate this organization button on the organization that has repos you want to enable.
- Choose a subscription plan.
- Next, verify your subscription plan and enter your email address.
- Click the Start subscription button to complete activating your Probo Organization.
Note: Your plan can be changed at any time to best for organization’s needs.
Now you can start activating repositories within your Probo Organization.
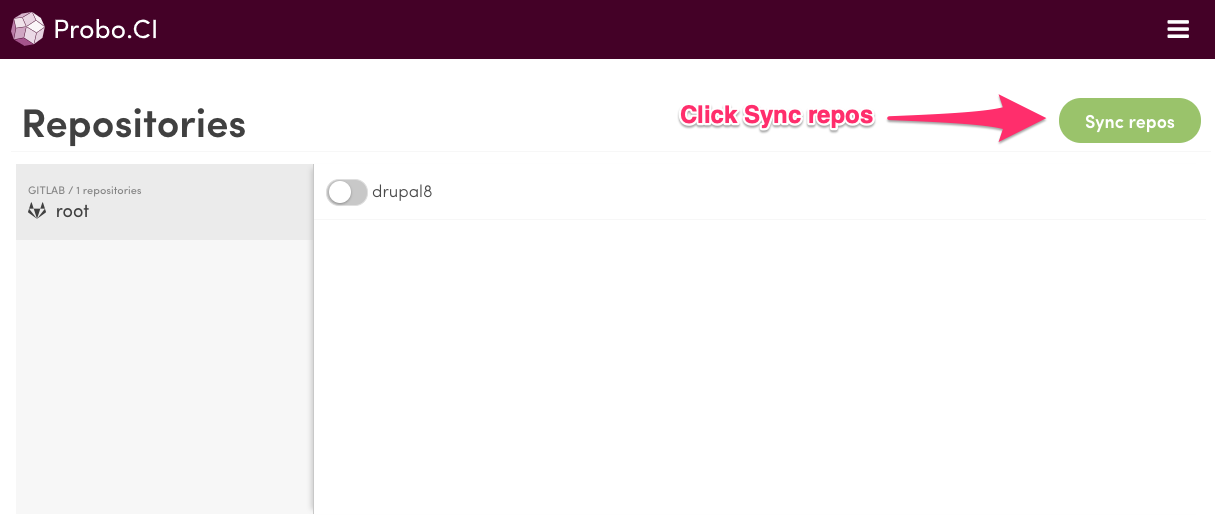
Activate repositories.
-
Go to https://app.probo.ci/#/self-hosted to authenticate, or go to the Projects Dashboard, https://app.probo.ci/#/dashboard/projects if already authenticated.
-
Sync and enable the repositories you want to connect with Probo.
- Press the Activate repos button.

- Press Sync repos and wait for Probo to pull in your GitLab Server repositories.
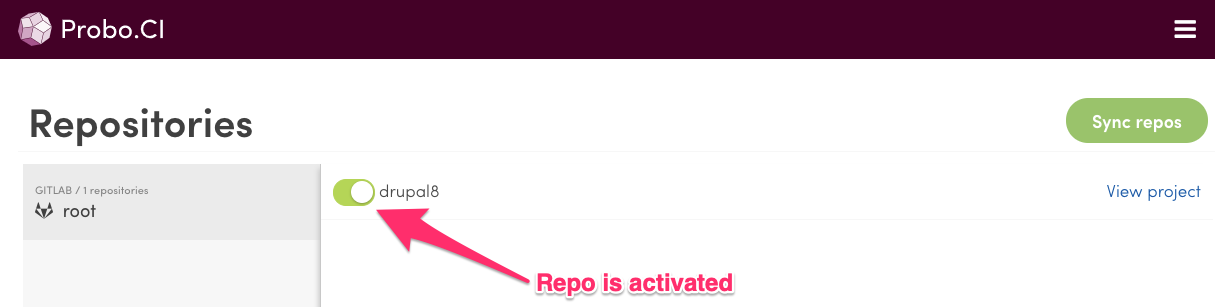
- Activate a repository by switching the toggle next to it to the on position. Once activated the toggle should be a green color.

- Press the Activate repos button.
Note: This step, if successful, will add a new webhook to the repository on your GitLab Server instance on the Integrations page within the enabled repository. Example: https://gitlab.example.com/org-name/repo-name/settings/integrations
That’s it! You are now ready to configure your build.