Setup Probo.CI for a Wordpress site that uses Bitbucket.
Probo.CI is here to make your development workflow more fluid. We want you to be able to configure Probo.CI to fit your project’s needs. Below is a step by step example of a standard Wordpress site install with Bitbucket. This walkthrough does not use all the available parameters provided by the Probo Wordpress plugin, but you can see more available parameters in the Probo Wordpress Plugin documentation.
You can find this Probo.CI example repository here.
Build Specs:
- A standard Wordpress site with a MySQL database.
- Your repository is stored on Bitbucket in Git or Mercurial.
Sign in and Sync up.
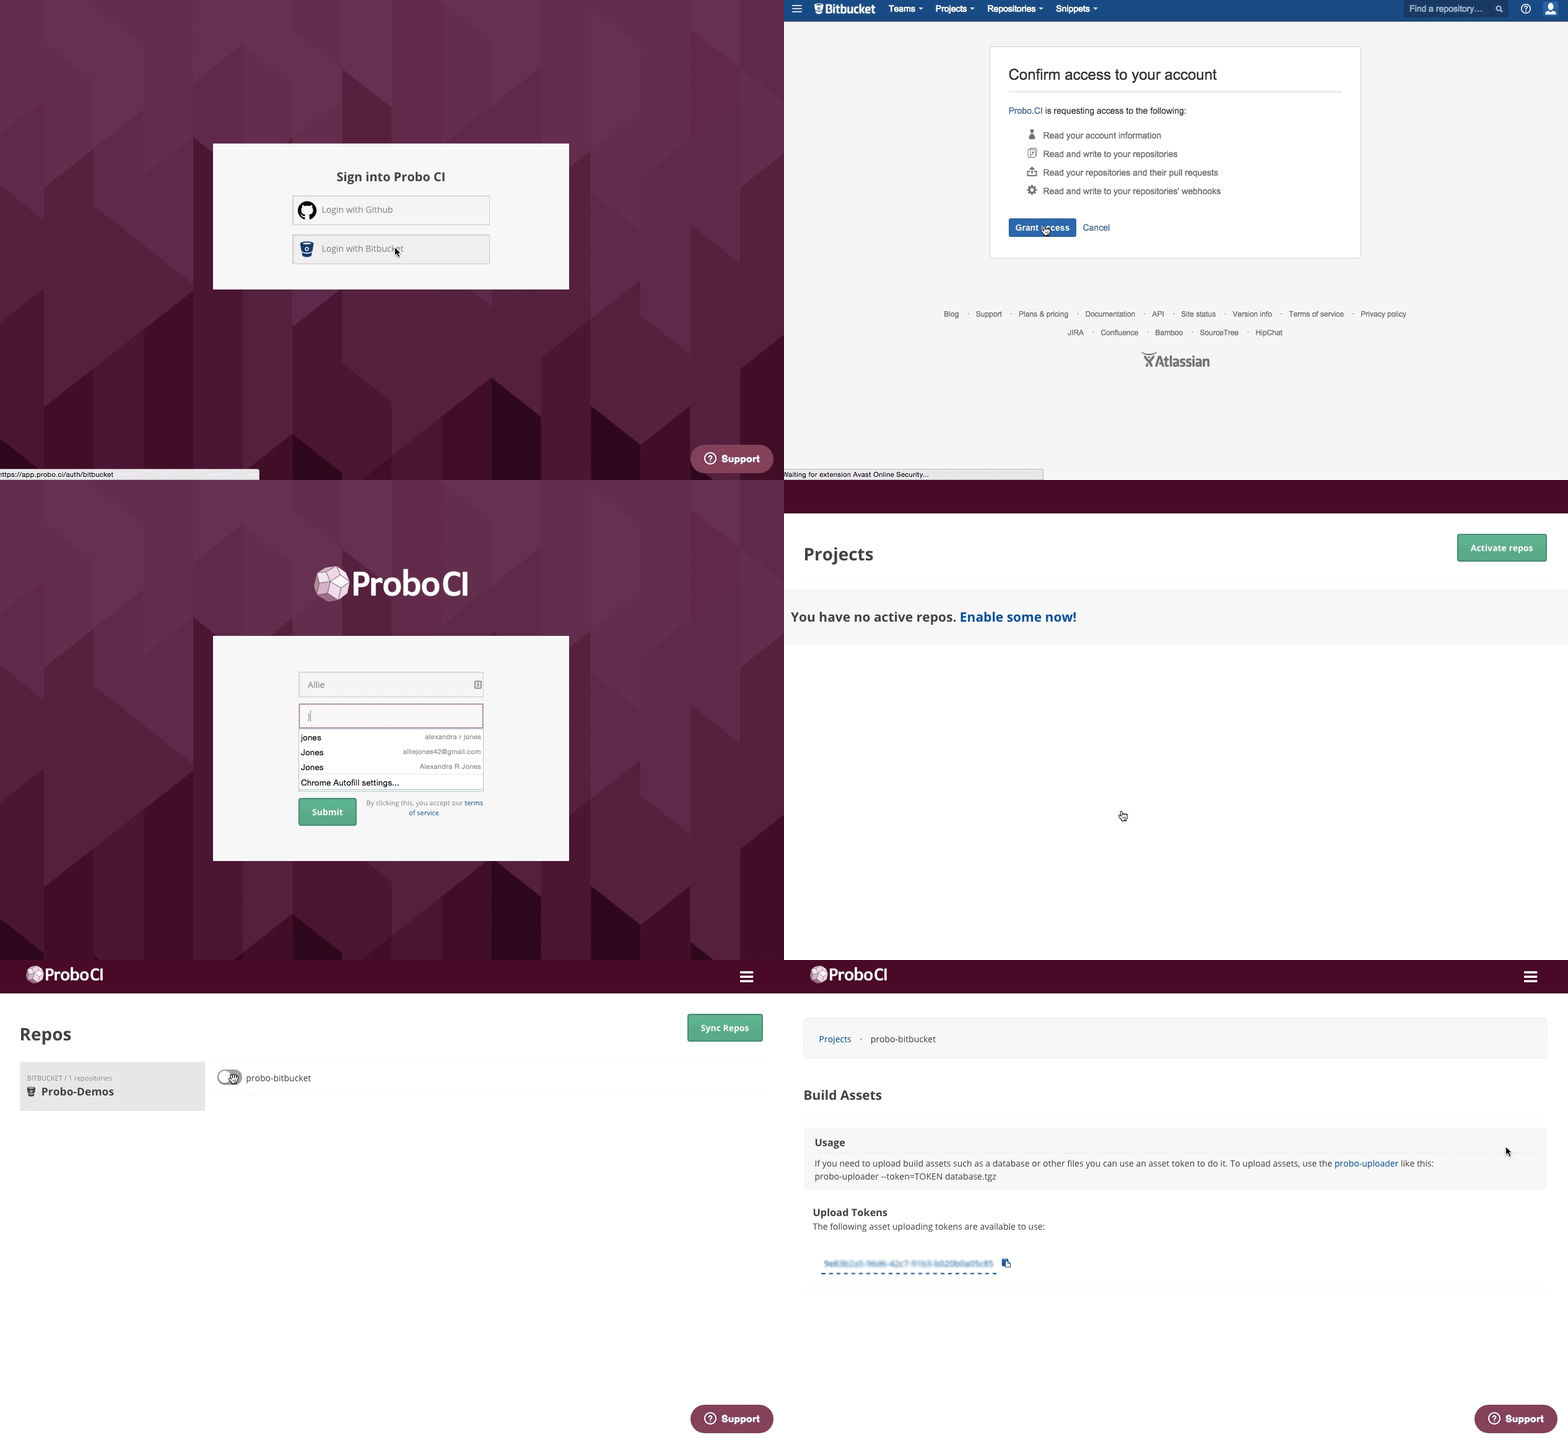
Step 1: Sign into the Probo.CI app and authenticate Bitbucket. Go to the Probo.CI app and click on the Login with Bitbucket button. Once you get to Bitbucket, click ‘Grant access’.
Step 2: Sync your Bitbucket Repos. Your Bitbucket repositories will be synced automatically. You can always click the ‘Sync Repos’ button at the top right corner if you need to manually update your dashboard. Click on the button next to each repo that you want to use with Probo.CI.

Prepare your Database.
You will need to import your project’s database within the Probo.CI App, or use the Probo Uploader, a CLI tool. You will first import your database, then you will declare the database file in a .probo.yaml file. We will use the Wordpress plugin to prepare the Wordpress install, import the database, and flush caches. (Cache all the things!)
Step 3: Prepare the Database
Export your existing MySQL database and ensure your database COLLATION is set to utf8mb4_unicode_ci or utf8_unicode_ci in the wordpress.sql file. There is currently an issue importing a DB with utf8mb4_unicode_520_ci COLLATION on our current docker images available for builds. Find and replace utf8mb4_unicode_520_ci with utf8mb4_unicode_ci in your exported wordpress.sql file if you receive the following error in your build:
ERROR 1273 (HY000) at line 25: Unknown collation: 'utf8mb4_unicode_520_ci'
Step 4: Compress your database.
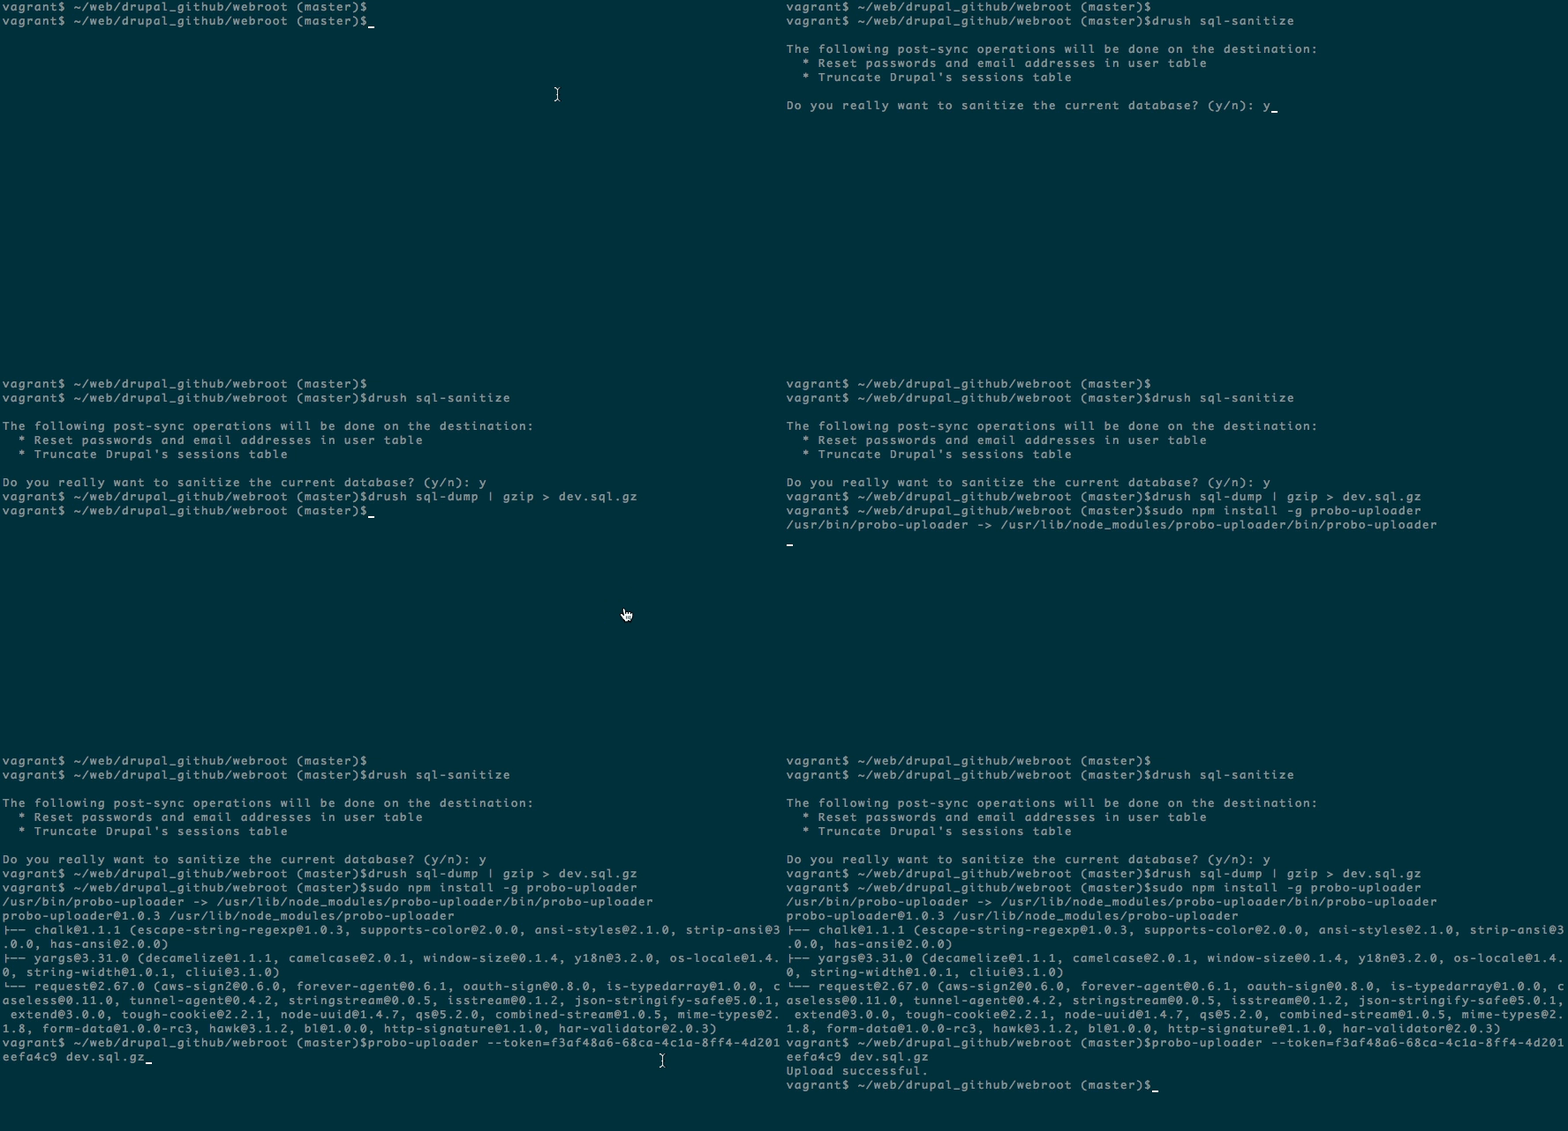
If you wish to compress your database you’ll need to use gzip. Other compressed file types like zip won’t work.
gzip wordpress.sqlStep 5: Install the Probo Uploader on your machine with npm. (Optional)
You will need Node.js for the Probo.CI Uploader. Install node.js and npm if you don’t already have them.
sudo npm install -g probo-uploaderStep 6: Upload your database to the Probo.CI app.
Probo users can now upload database assets and other file assets directly from within the Probo.CI app on the Build Assets tab within their project.
Each repository also has it’s own Upload Token that can be used to upload file assets through the command line. You can find your project’s Upload Token on the Upload Tokens tab within the Probo project.
probo-uploader --token=[your-token] wordpress.sql.gz
Define your website configuration for Probo.
The real magic of Probo.CI is automating pull requests to create test environments for you. In order to do that, you will need to add a few things to your project.
Step 7: Create a new branch.
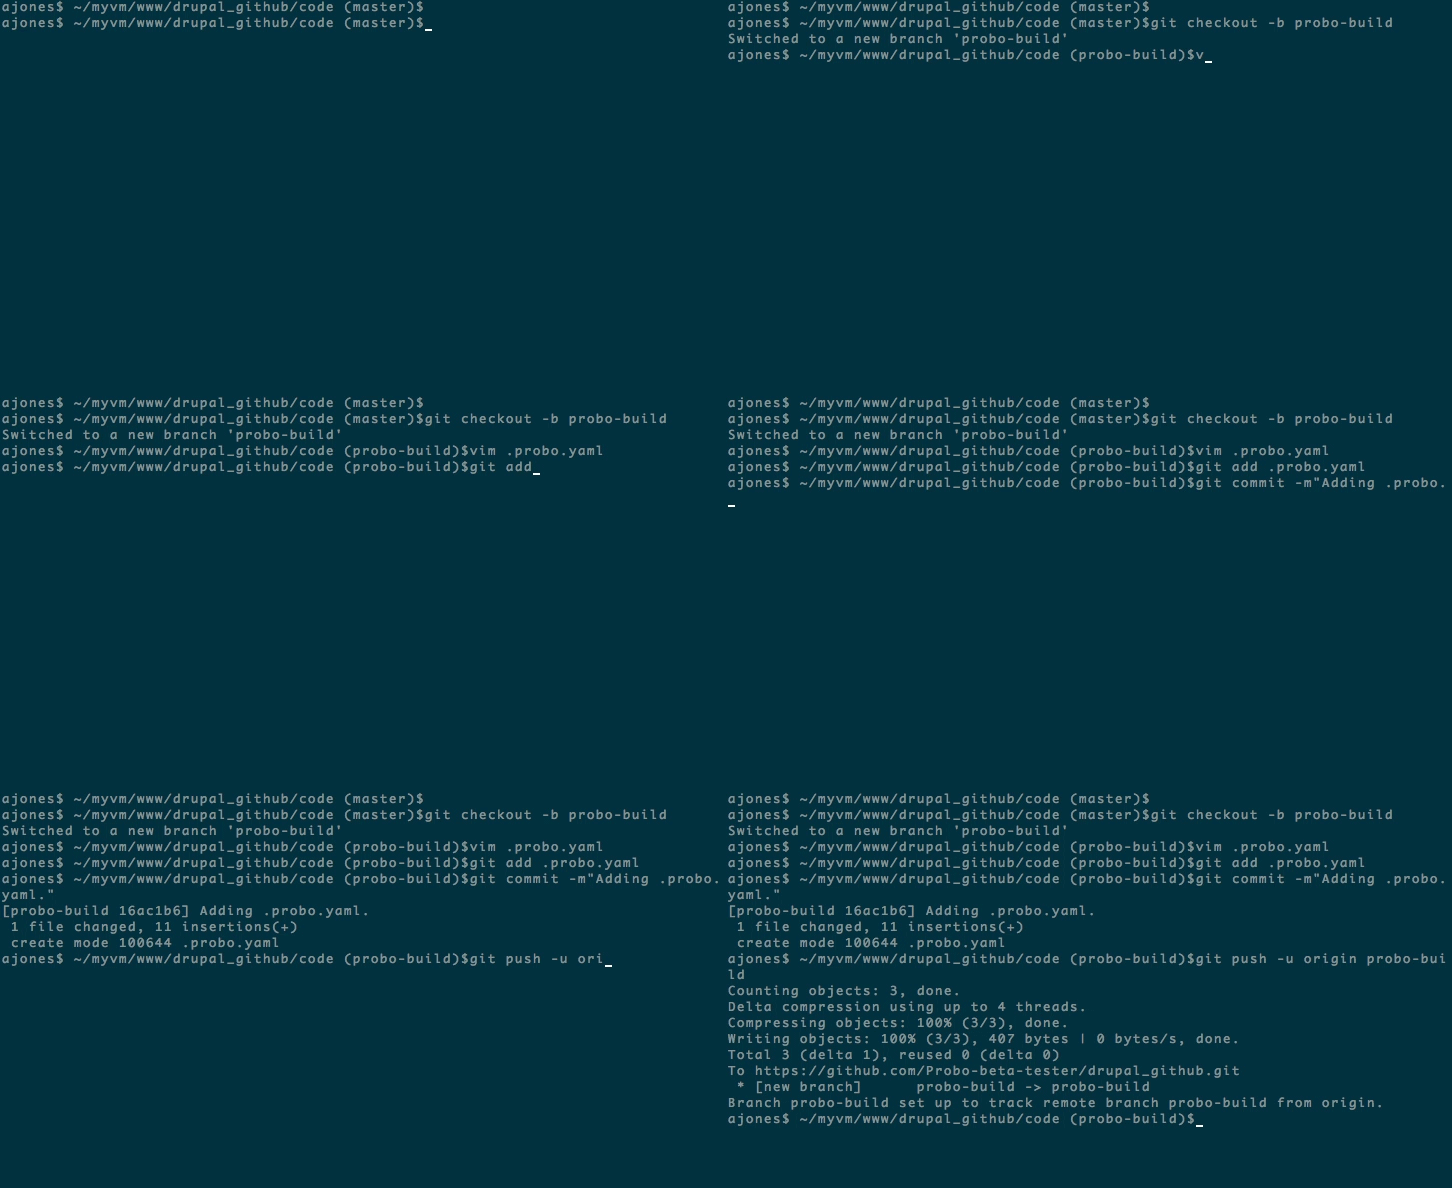
cd into your project and create a new branch.
git checkout -b probo-buildStep 8: Create your .probo.yaml file.
You will need a .probo.yaml file in the root of your directory. You can task Probo.CI to run any number of build steps. Each step is a runnable plugin, and will get a status update sent to hosted repository for the commit. * Remember that indentation and spacing is important for yaml files.
vim .probo.yamlStep 9: Declare your assets and build your steps.
Tell Probo.CI what database you are going to use for your Probo.CI builds. Add in your parameters as steps. You can read more in the docs about different parameter options.
assets:
  - wordpress.sql.gz
 steps:
  - name: Site setup
    plugin: WordPressApp
    database: 'wordpress.sql.gz'
    databaseName: 'wordpress'
    databaseGzipped: true
    subDirectory: 'code'
    devDomain: 'http://example.com'
    devHome: 'http://example.com/'
    flushCaches: true
Note: The wp-cli version we have currently on our docker images is old. Add a step before the Site setup step to update wp-cli if you receive the following error in your “Site setup” build step:
Fatal error: Call to undefined function apply_filters() in /src/wp-includes/load.php on line 316
Update wp-cli in your .probo.yaml steps.
    assets:
      - wordpress.sql.gz
    steps:
      - name: Update wp-cli.
        plugin: Script
        script:
          - wp cli update --allow-root --yes
      - name: Site setup
        plugin: WordPressApp
        database: 'wordpress.sql.gz'
        databaseName: 'wordpress'
        databaseGzipped: true
        subDirectory: 'code'
        devDomain: 'http://example.com'
        devHome: 'http://example.com/'
        flushCaches: true
Step 10: In your new branch probo-build, add and commit your files to your remote origin.
 git add .probo.yaml
 git commit -m "Adding .probo.yaml."
git push -u origin probo-build 
View your build.
Step 11: Locate your branch in Bitbucket. Go to your Bitbucket account and click on Branches in the left navigation menu. You will see your new branch in the list. Click on the new branch name to view details.
Step 12: Create a pull request. On the details page, click the ‘Create pull request’ link. Verify your branch is pointing to master, enter the title of the pull request and click the ‘Create pull request’ button.
Step 13: Bask in the glory of Probo.CI.
In the Overview section of the pull request, look for the build status link. It will say something like “3 of 5 passed”. Click this link to see the build steps and status. Click on one of the build steps to be taken to the Probo.CI dashboard.
Step 14: See your Probo.CI build.
In your Probo.CI dashboard, click on ‘View site’ and your site will open in a new tab. This probo.build link uses the database defined in your .probo.yaml file and the code from your pull request.
Step 15: Share your Probo.build link with clients, managers, even your parents. Note: It might take a few seconds for your Probo.CI environment to build. Wait until all checks have passed before following your Probo.build link.